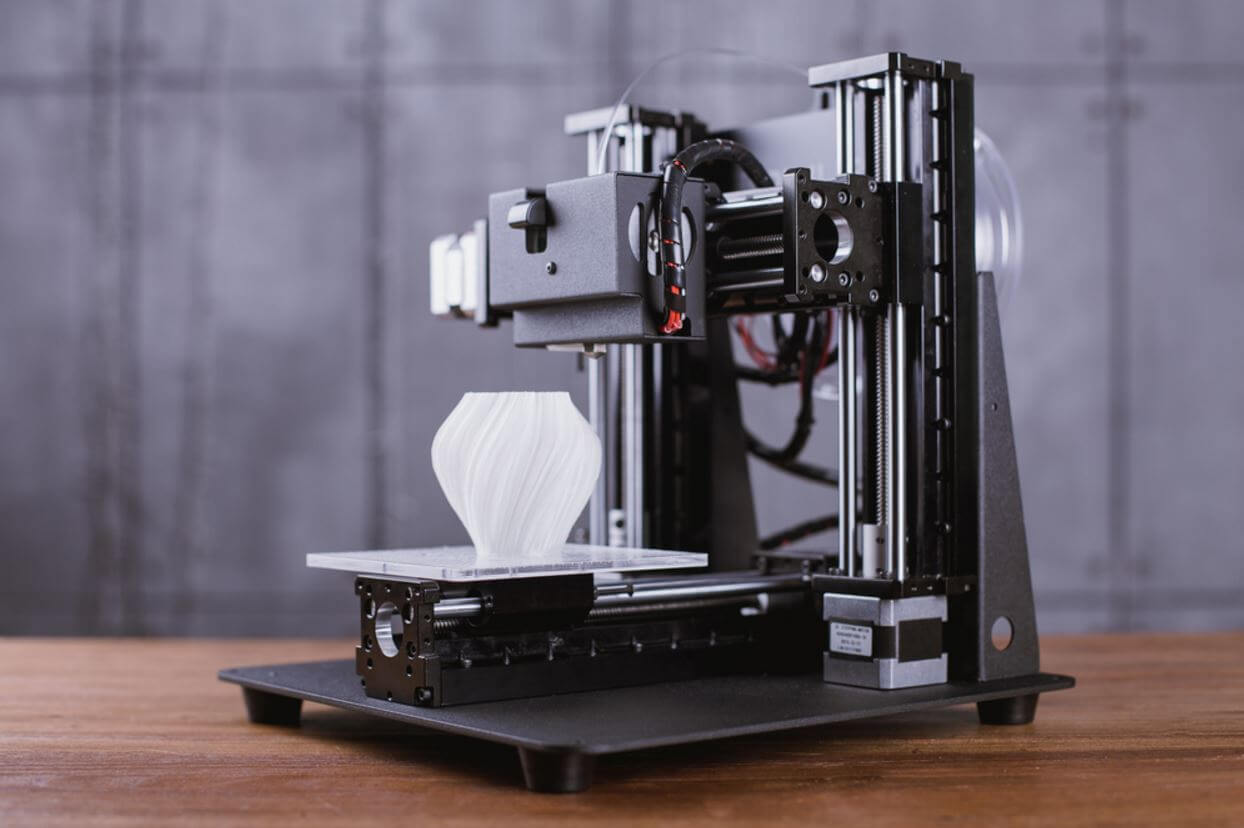
This buyer’s guide is about the 3D printers that offer both quality and affordability. Our guide is separated into three sections, with each section containing products under a specific price range ($300, $500, $1,000). This should make it easier for you to find the product that best suits your budget.
BEST 3D PRINTERS UNDER $300
In this price range, it’s important to approach 3D printers with reasonable expectations. Because you can’t really expect $300 3d printers to offer the same specs and features offered by $1,000 printers. Most of the products at this price point need modifications in several areas in order to produce the best results. The listed products here are the ones that bring real quality and are not necessarily the cheapest on the market.
| Product | Layer Thickness | Max Build Size | Filament Diameter | Supported Materials | Connectivity | Weight |
| Monoprice Select Mini V2 | 100 microns | 4.7 x 4.7 x 4.7 in | 1.75 mm | PLA, ABS, TPU, HIPS, and more | Wi-Fi, USB, SD card | 9.9 lb |
| Monoprice Maker Select V2 | 100 microns | 7.9 x 7.9 x 7.1 in | 1.75 mm | PLA, ABS, TPU, HIPS, and more | USB, SD card | 20 lb |
| Folger Tech 2020 Prusa i3 | 50 microns | 8 x 8 x 6 in | 1.75 mm | PLA, ABS, Wood, TPE, and more | USB | 15.4 lb |
| Jgaurora A3 | 100 microns | 7.9 x 7.9 x 7.1 in | 1.75 mm | PLA, ABS, TPU, Wood, and more | USB, SD card | 22 lb |
| XYZprinting da Vinci Jr. 1.0 Pro | 20 microns | 5.9 x 5.9 x 5.9 in | 1.75 mm | PLA, Tough PLA, PETG | USB, SD card | 26.5 lb |
 Monoprice Select Mini V2
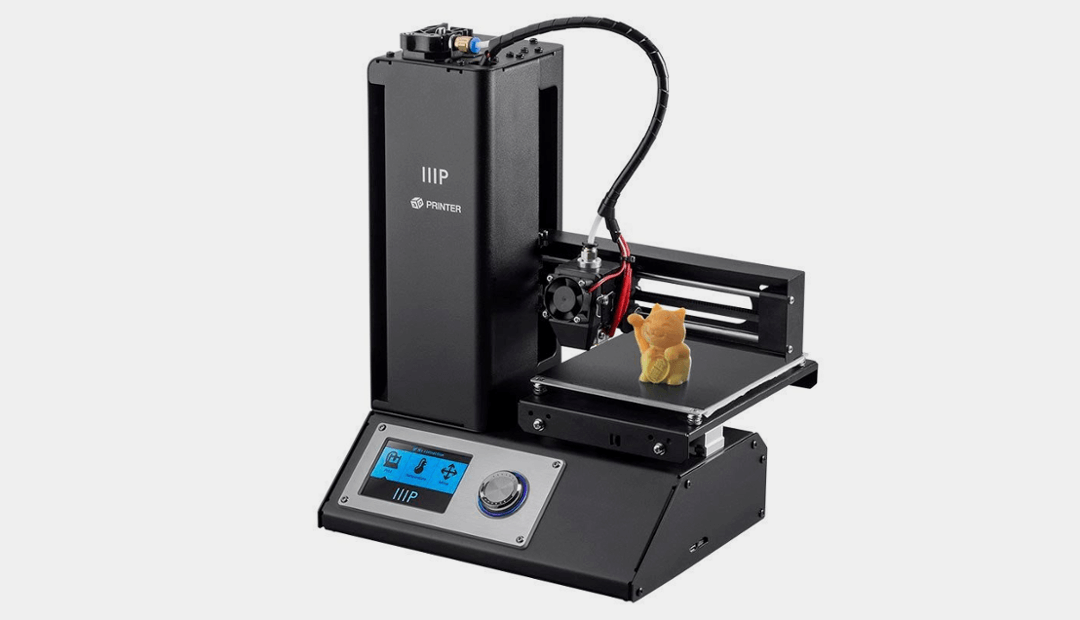
The Select Mini is a great entry-level 3D printer for beginners. First of all, it arrives fully assembled out of the box. There’s no need to go through a lengthy assembly process that can take anywhere between six hours to 12 hours. The initial setup only takes about 30 minutes, maybe one hour if you take your time reading the instruction manual.
Made of quality materials, the Select Mini is a compact 3D printer with a small footprint, making it an excellent fit on any work desk. It’s also lightweight enough for easy transfer in a school setting. On the flip side, the Select Mini’s compact profile comes with a steep price: a limited build volume. This means large, complex 3D models are off the menu for you.
Unlike many other cheap 3D printers in this price range, the Select Mini actually comes with a heated print bed, which allows you to experiment with more advanced materials. Most materials require a lot of tinkering and a bit of modification, though. In fact, most users simply stick to ABS and PLA and leave the materials experimentation to more capable 3D printers.
Speaking of users, the Select Mini has a large community, so you will never be alone when taking on any issues you may encounter down the road. There are lots of guides about the Select Mini on the internet, ranging from troubleshooting guides to modding guides.
The Select Mini is the ultimate proof that you don’t have to spend a large amount of money for a quality product in order to get into 3D printing. If you want the cheapest 3D printer that can actually deliver, get the Select Mini.
 Monoprice Maker Select V2
Just like the Select Mini, the upgraded Maker Select is mostly assembled out of the box. It needs minimal hardware tinkering at the onset outside of tightening a few screws. It’s ready to go in about 30 minutes. Everything you need to get started right way is included in the package, including a free filament and a few test models on the SD card.
However, the Maker Select is one of those 3D printers that require a few modifications before it can produce real results. For more information on that, check out some of the guides posted on forums dedicated to the Maker Select. It’s easy to find information on the Maker Select because, like the Select Mini, it’s got a large community online.
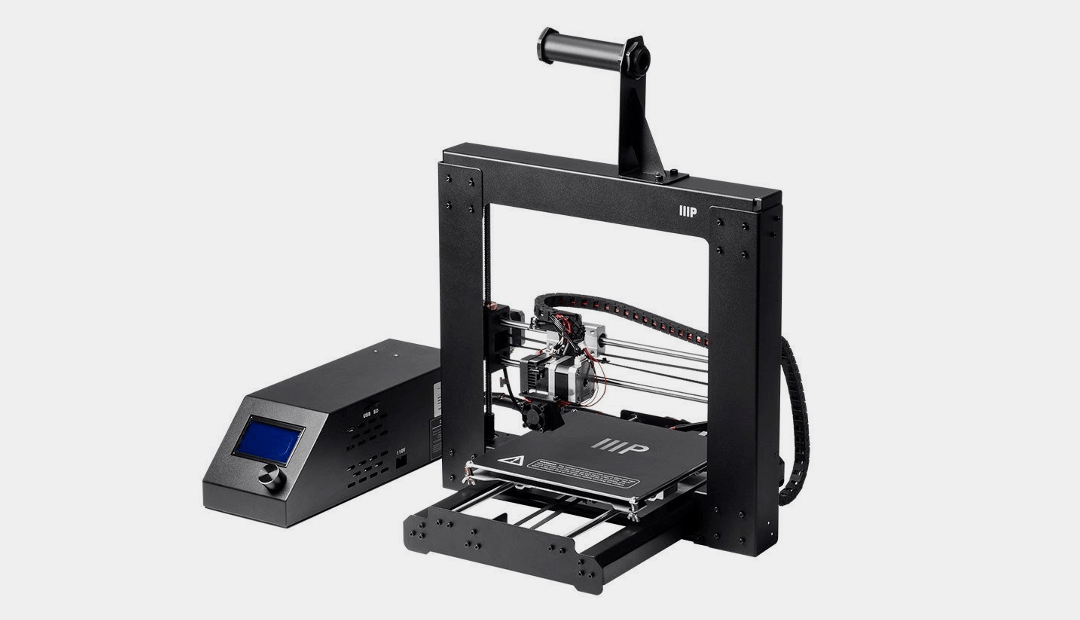
The Maker Select is housed in a sturdy frame with a spool holder at the top. It is accompanied by a separate controller box. The LCD interface and USB and SD ports are all located on the controller box. The Maker Select is an open-framed 3D printer, so you might want to build your own enclosure – unless you only plan to print with PLA.
In all, the Maker Select is a solid 3D printer that can deliver excellent results with the right setup. It’s got one of the more generous build sizes in this price range and also comes with a heated print bed, which allows you to print with all sorts of materials. It’s a recommended product for tinkerers.
 Folger Tech 2020 Prusa i3
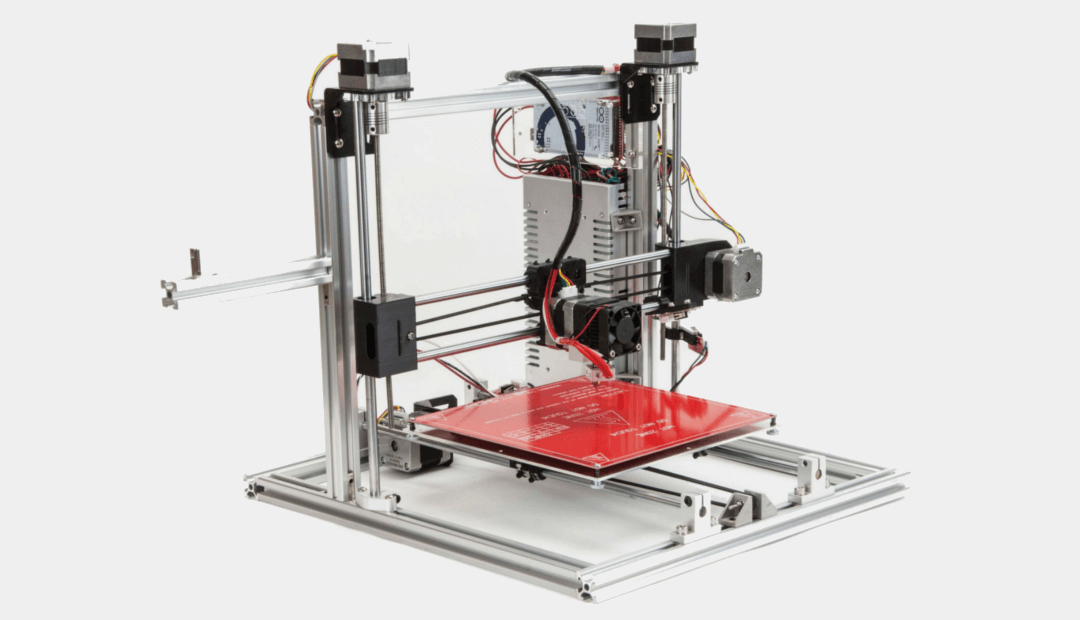
The Folger Tech 2020 Prusa i3 comes from a US-based company. It’s a DIY kit, so it needs to be assembled from scratch. The assembly process isn’t too difficult, requiring only about six hours even though the instructional manual is below-average at best. It’s recommended that you simply follow guides or instructional videos on the internet for the assembly.
For a 3D printer under $300, the Folger Tech 2020 Prusa i3 sure packs a punch. It’s got good print quality and comes with a large build size, which literally makes it stand out in this price range. The print speed is decent, too, and the heated build plate means you can play around with more exotic materials to produce complex 3D models.
Now here comes the bad news. The Folger Tech 2020 Prusa i3 needs upgrades right out of the box, and the first thing on your list should be a replacement extruder. The default extruder isn’t the best and is destined to break down in just a few weeks or months. In addition, the Folger Tech 2020 Prusa i3 desperately needs cable management because the wires are so messy.
Most 3D printers in this price range require a fair amount of modifications and a heavy dose of patience in order to shine, and the Folger Tech 2020 Prusa i3 is no different. It’s a robust machine that can produce impressive results with the proper settings and upgrades. If you want to learn about 3D printers and actually get a kick out of tinkering with machines and electronics, check out the Folger Tech 2020 Prusa i3.
 Jgaurora A3
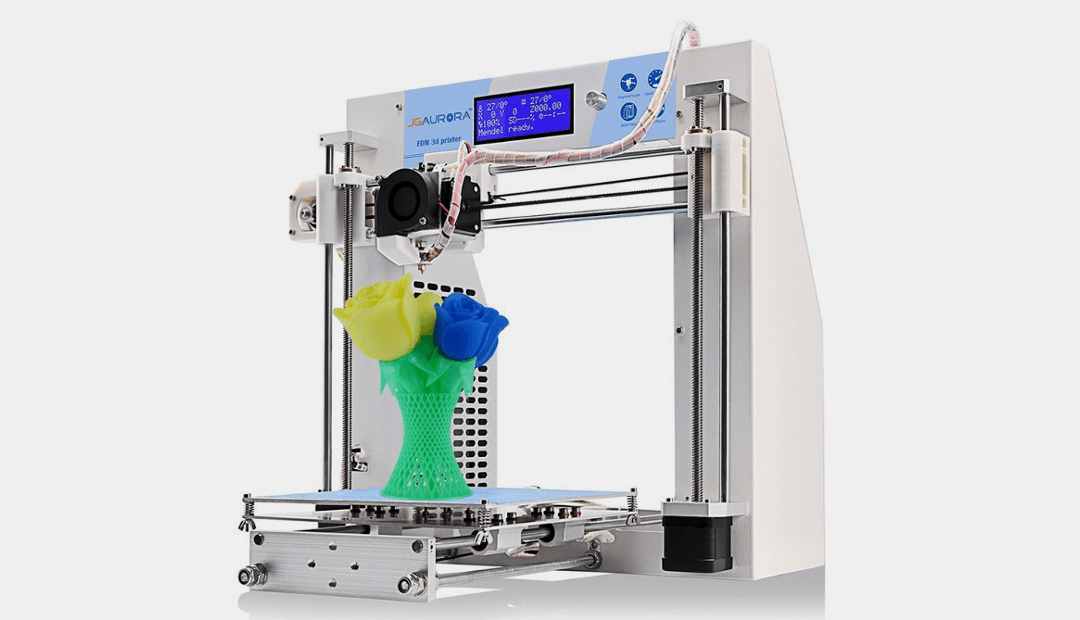
Being a DIY kit, the A3 requires the full-on assembly process, demanding at least eight hours for the assembly and maybe another hour or two for the initial calibration. It’s best to set aside an entire day for the assembly instead of doing it during your free time across several days, which might cause you to forget what you’re supposed to do next.
The instructions, which come in video format, are included in the SD card. However, the steps in the video are described in text format – no audio. Though they can be confusing in some parts due to the “Engrish” texts, the instructions are good enough to keep your frustration at bay.
If the video instructions are too difficult for you to follow, you can contact the manufacturer and ask for technical support. Jgaurora stands out as one of the best at providing support, attending to issues in a timely and professional manner and making sure every customer is satisfied with their purchase.
The A3 is equipped with a pair of features commonly seen in other Prusa-based 3D printers: a heated build plate, which expands the materials you can use, and a knob-operated LCD interface. The print bed is a bit tricky to level, which will likely frustrate the hell out of you during your first few times.
Boasting a large build volume and good print quality, the A3 is an absolute workhorse once you have it configured properly. It can produce accurate and precise prints in a consistent manner. It runs relatively quiet, too, which is uncommon for an open-framed 3D printer.
If you need a cheap, reliable 3D printer with a sturdy all-metal frame, the A3 is one of the best options on the market. It’s not the most loaded with features that can easily impress tech enthusiasts, but it makes up for that by simply being great at what it can do.
 XYZprinting da Vinci Jr. 1.0 Pro
On the bright side, XYZprinting does not strictly sell locked-out 3D printers. The company also offers a number of products with an open filament system, and one such product is the da Vinci Jr. 1.0 Pro.
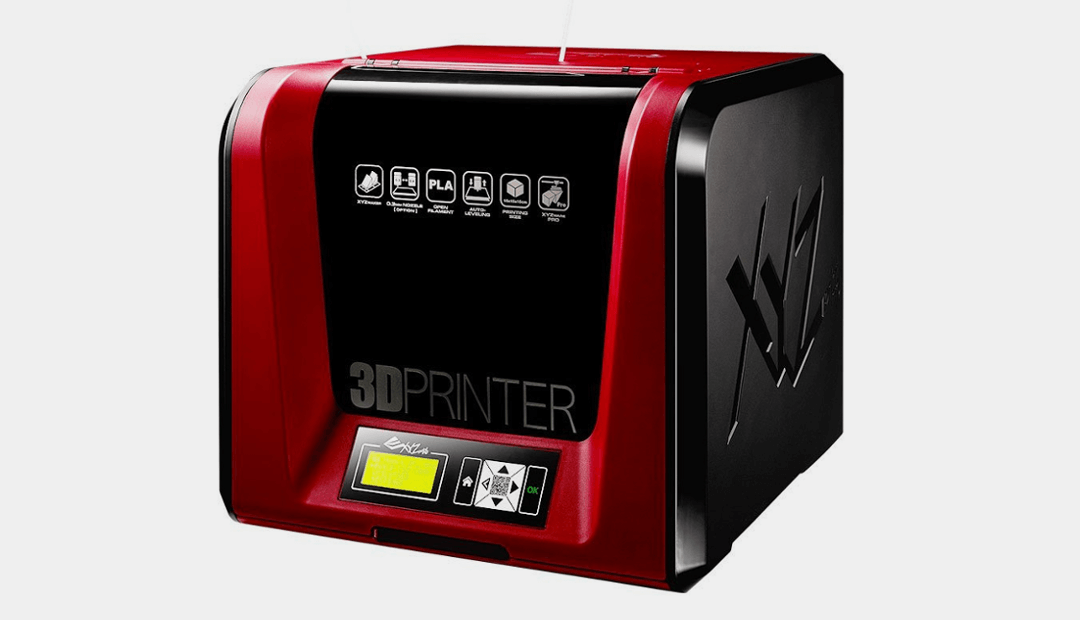
The da Vinci Jr. 1.0 Pro is a fully enclosed 3D printer with a decent build volume. It’s larger than most mini desktop 3D printers but smaller than Prusa-based 3D printers such as the Jgaurora A3 and the Monoprice Maker Select. The full enclosure means the da Vinci Jr. 1.0 Pro is safe to use for kids, making it a perfect 3D printer for educational use at the primary level.
The da Vinci Jr. 1.0 Pro offers a straightforward initial setup, with the usually tricky bed calibration taking only a few minutes, courtesy of the automatic bed leveling system. The filament is easy to load and the LCD interface is easy to navigate.
The open filament system sounds great, but there are a couple of reasons why you shouldn’t get excited too much about it. First, the warranty is voided the moment you use a third-party filament. It’s a risk you must be willing to take. And second, the spool holder of the da Vinci Jr. 1.0 Pro is designed specifically for XYZprinting filaments. This means you need to build your own external spool holder for third-party filaments.
XYZprinting offers a nozzle upgrade for the da Vinci Jr. 1.0 Pro. The nozzle upgrade is necessary if you want to print with that advertised 20 microns layer resolution. But even without the upgrade, the da Vinci Jr. 1.0 Pro is still capable of producing accurate and detailed prints.
Despite its obvious limitations, the da Vinci Jr. 1.0 Pro still comes out as one of the best cheap 3D printers you can get for $300. It’s extremely easy to use and maintain and comes fully assembled out of the box, making it an ideal machine for beginners.
BEST 3D PRINTERS UNDER $500
The $300-500 price range offers a better selection of quality products. In this price range, you get more access to fully enclosed and semi-closed 3D printers. The clear top product is another machine from Monoprice, one of the most popular manufacturers of cheap 3D printers, but there are also excellent contenders out on the market. Like with 3D printers under $300, the products at this price point need to be approached with reasonable expectations.
| Product | Layer Thickness | Max Build Size | Filament Diameter | Supported Materials | Connectivity | Weight |
| XYZprinting da Vinci 1.0 Pro | 100 microns | 7.8 x 7.8 x 7.8 in | 1.75 mm | PLA, ABS, Tough PLA, PETG, and more | Wi-Fi, USB | 58.6 lb |
| Qidi Tech X-one2 | 100 microns | 5.5 x 5.5 x 5.5 in | 1.75 mm | PLA, ABS | USB, SD card | 41.9 lb |
| FlashForge Finder | 100 microns | 5.5 x 5.5 x 5.5 in | 1.75 mm | PLA | Wi-Fi, USB | 44.1 lb |
| Monoprice Maker Select Plus | 100 microns | 7.9 x 7.9 x 7.1 in | 1.75 mm | PLA, ABS, Flexible, Wood, and more | USB, SD card | 22 lb |
| Flsun i3 Plus | 50 microns | 11.8 x 11.8 x 16.5 in | 1.75 mm | PLA, ABS, PETG, HIPS, and more | USB, SD card | 22 lb |
 XYZprinting da Vinci 1.0 Pro
First, let’s talk about the elephant in the room. XYZprinting is known for its use of proprietary filaments, which are more expensive than other filaments from third-party vendors. In addition, XYZprinting filaments aren’t exactly heralded for their quality, making their price tags even tougher to swallow. The good news is that you don’t have to deal with XYZprinting filaments if you buy the da Vinci 1.0 Pro.
Similar to the da Vinci Jr. 1.0 Pro, the da Vinci 1.0 Pro has an open filament system, allowing you to use filaments from other manufacturers. The trade-off is that you lose your warranty, so don’t expect XYZprinting to send a replacement in case the third-party filament you used caused a critical error that rendered your machine useless. In addition to that, an external spool holder is necessary for third-party spools.
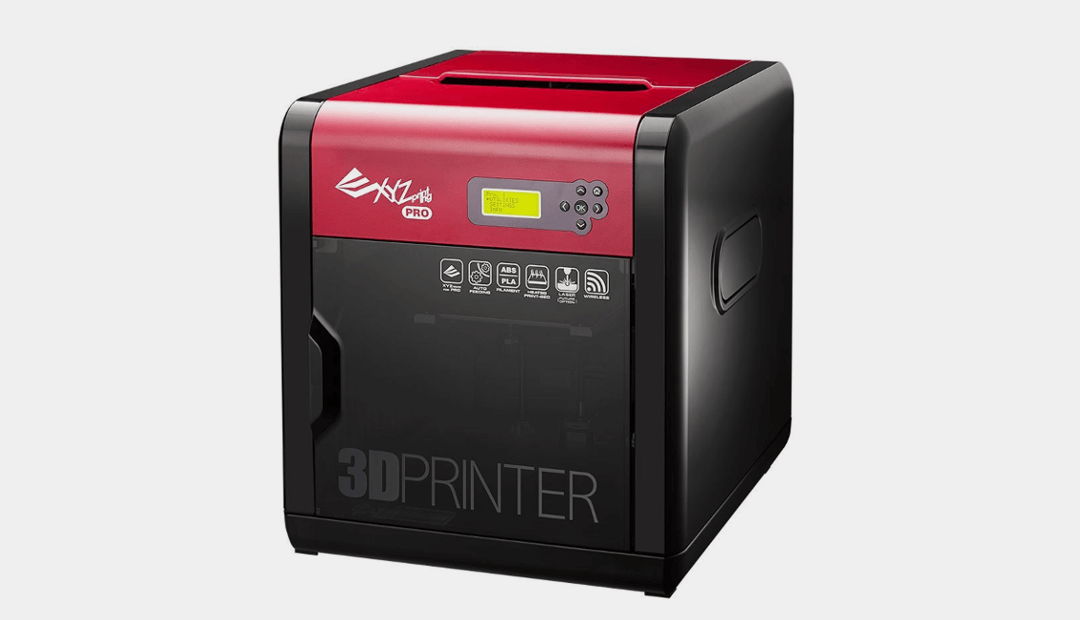
A fully assembled 3D printer out of the box, the da Vinci 1.0 Pro is easy to set up. The bed leveling process is made easier by the assisted bed leveling system and the software installation is a straightforward affair. Equipped with a heated aluminum build plate, the da Vinci 1.0 Pro can print with more advanced materials, which expands the type of objects you can create.
The da Vinci 1.0 Pro was designed with user convenience in mind, featuring the ability to connect wirelessly via a local network. This means you can easily send print jobs from your computer or smartphone/tablet without cables. Sadly, there’s no onboard camera, so you can’t monitor your print progress from afar.
Considering everything it brings to the table, it’s a bit surprising the da Vinci 1.0 Pro is only slightly more expensive than the da Vinci Jr. 1.0 Pro. It’s a solid machine that offers real value and is a recommended 3D printer for professionals on a strict budget.
 Qidi Tech X-one2
First, it makes really good 3D printers, which is the most importing thing. And second, Qidi Tech provides arguably the best customer service by a Chinese company, responding to inquiries in a friendly manner and attending to issues, big or small, in a timely manner.
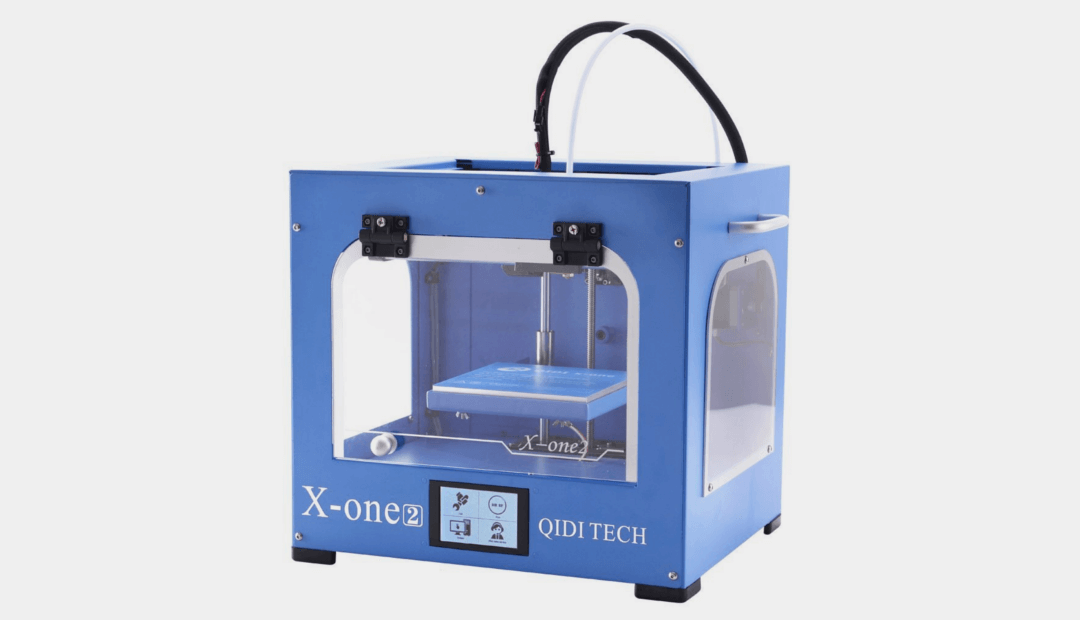
In this price range, Qidi Tech is represented by the X-one2, one of the sturdiest cheap 3D printers on the market. It’s a desktop 3D printer that arrives mostly assembled and only requires less than one hour for the initial setup, and that includes the print bed calibration. It’s an enclosed 3D printer with acrylic-made windows and front door.
Instead of the usual knob-operated LCD interface seen on most cheap 3D printers, the X-one2 includes a touchscreen interface located at the base. The small interface is easy to navigate and features straightforward options. It’s not a fancy touchscreen interface similar the ones seen on premium 3D printers, so don’t expect too much.
The X-one2 is equipped with a heated print bed which, combined with its enclosed setup, allows you to successfully print ABS. The print bed also has good adhesion, so you get better prints. On the flip side, the X-one2 doesn’t have the most generous build volume; it’s only slightly larger than most mini 3D printers. This puts a limit on the kind of projects you can take on.
In summary, the X-one2 is a 3D printer that you can rely on to consistently get the job done. It’s got good print quality for a cheap 3D printer and is really easy to use. It’s backed by an honest company that genuinely cares about its customers and is one of the most durable 3D printers in this price range.
 FlashForge Finder
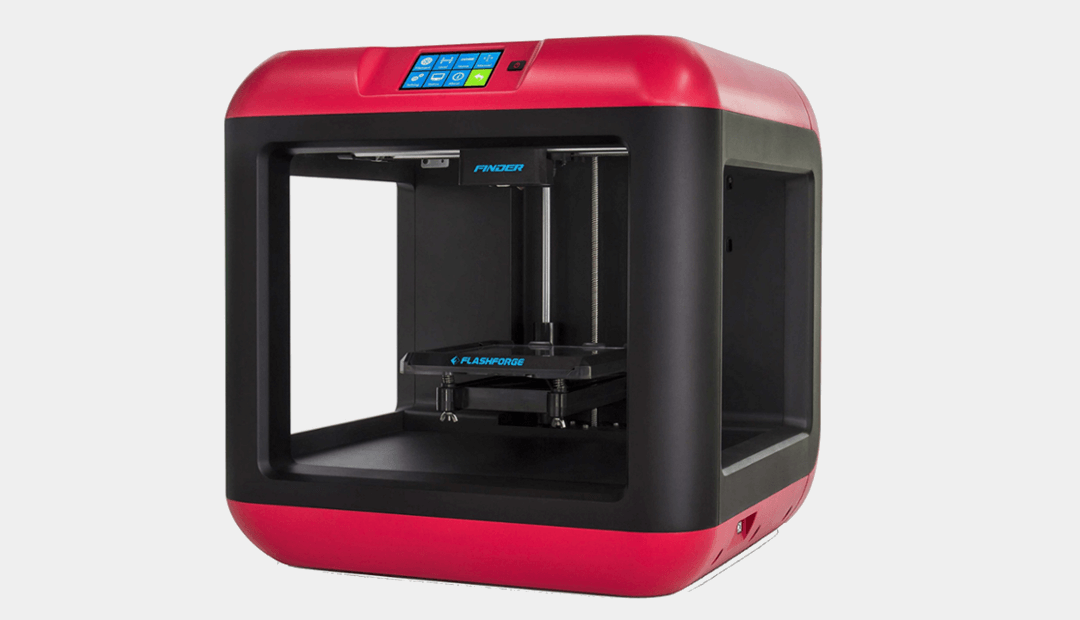
The Finder is semi-enclosed with a sturdy plastic frame, featuring a touchscreen interface at the top and a slide-in build plate for easy removal of completed objects. It is fully assembled out of the box and requires minimal tinkering at the onset before it can start its first print. This is why it’s a highly recommended entry-level 3D printer for beginners.
The print bed is non-heated, which means you can’t print with ABS and other similar materials. In short, the Finder is limited to PLA. This limitation shouldn’t bother you too much if you’re just starting out. But once you’re ready to move on to the next level in 3D printing, the Finder’s limitation will be magnified.
Moreover, the Finder’s limited build size isn’t good enough for the long haul. It’s still more generous than most mini 3D printers out on the market, though. On the bright side, the Finder’s more compact profile makes it easy to fit on any work desk.
Though categorized as a cheap 3D printer, the Finder certainly doesn’t perform like one. It is capable of producing smooth and detailed prints, besting some of the more expensive 3D printers on the market. The print speed is relatively fast and the noise level is fairly low, too, which isn’t normally the case for most 3D printers without a full enclosure (the Finder is only semi-enclosed).
The Finder is one of the best 3D printers for beginners, requiring minimal tinkering before and after every print job. It’s easy to use and produces impressive results for a budget 3D printer. If you just want to print with PLA and prefer not to deal with too many technicalities, the Finder is for you.
 Monoprice Maker Select Plus
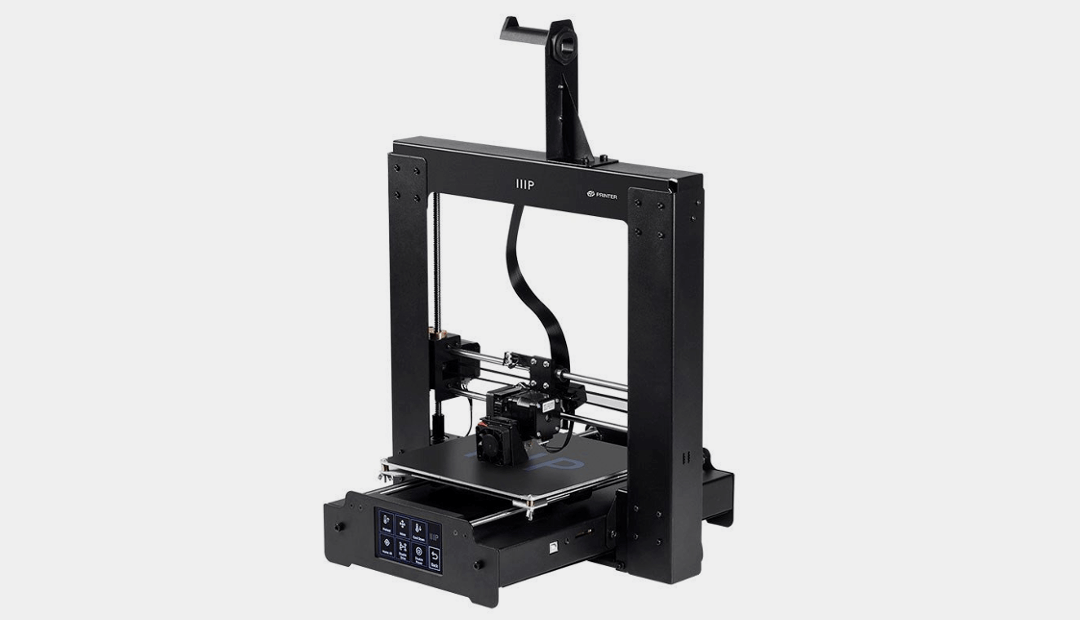
The Maker Select Plus is nearly assembled out of the box and is just as easy to set up as the Maker Select, requiring only 30 minutes for the initial setup and software installation. It is housed in a sturdy open frame with a spool holder that needs to be screwed-in at the top.
Unlike the Maker Select, the Maker Select Plus no longer needs to be connected to a separate control box at all times. Instead, the control box is fully integrated into the machine, which translates to a smaller footprint on your work desk. In addition, the Monoprice threw away the old knob-operated interface and replaced it with a more modern touchscreen interface.
The Maker Select Plus’s technical specifications are nearly identical to the Maker Select’s. It’s got a heated print bed and an open filament system. Monoprice advertises a faster print speed, but the upgrade is barely noticeable. Usually, 3D printers with a “plus” in the model name are larger versions of the base product. This is not the case with the Maker Select Plus, however. It comes with the same maximum build volume as the Maker Select.
Much like the Maker Select, the Maker Select Plus is more of a tinkerer’s machine. Sure, it’s easy to set up out of the box, but in order to get the best results, it needs a fair amount of mods. If the Maker Select isn’t really your type because you prefer a 3D printer with a slightly more modern design, get the Maker Select Plus.
 Flsun i3 Plus
First off, the Flsun i3 Plus is strictly a tinkerer’s machine, so don’t even think about making it your starter 3D printer, especially if you’re not particularly good with electronics. It’s a DIY kit that needs to be assembled from scratch. The assembly time is at least 10 hours. The instruction manual is a mess, which further complicates the already daunting assembly process.
The included instructions are for a different product, actually. The Flsun i3 Plus is the larger version of Flsun’s Prusa-based 3D printer and is available in both single extruder and dual extruder setups. The instruction manual is for the normal-sized, single-extruder version of the product. So, in order to successfully go through the assembly process, you need to rely heavily on online guides and instructional videos.
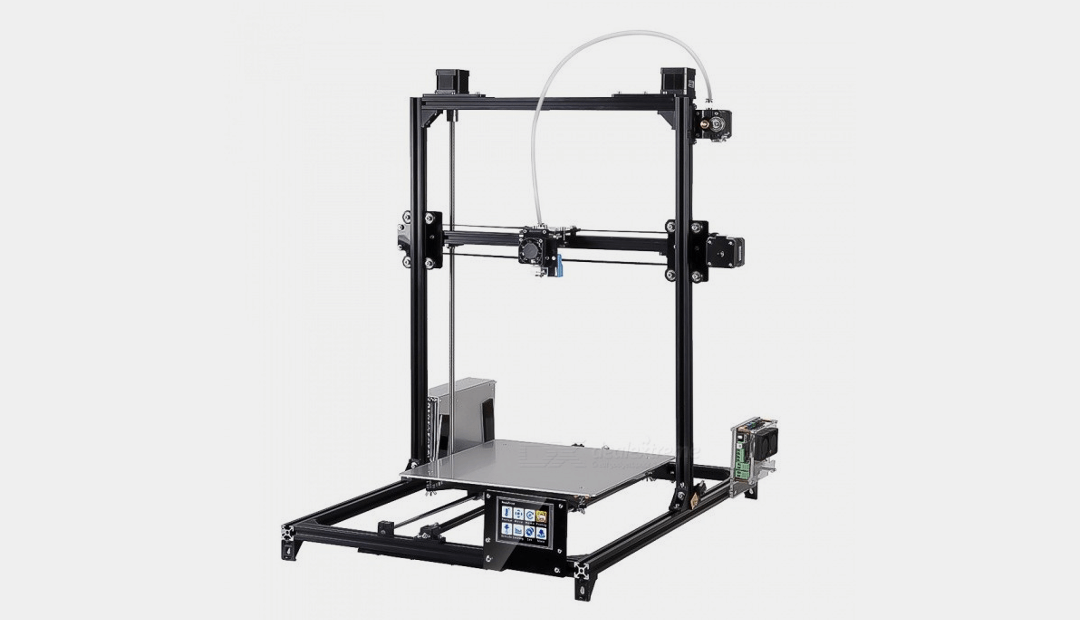
The Flsun i3 Plus comes with a heated build plate and a touchscreen interface. It is a non-enclosed 3D printer with a sturdy frame. It is one of the cheapest 3D printers with automatic bed leveling technology, so at least the bed calibration process is quick and easy, unlike the assembly process.
Like many other 3D printers in this price range, this Flsun Prusa-based 3D printer needs a fair amount of mods and upgrades in order to produce consistently good results. For starters, we recommend that you get a better power supply and a more reliable print bed.
Though not on the same level as the Creality CR-10S, the Flsun i3 Plus is still a good 3D printer that can produce excellent results with the proper print settings and some modifications. It is also one of the cheapest dual extruder 3D printers on the market.
BEST 3D PRINTERS UNDER $1,000
Once you go past $500, the field opens up significantly, giving you a lot of options. In this price range, the Original Prusa i3 MK3 is hands down the best 3D printer on the market. But there are also other fantastic products that are worth your money. Including the MK3, here are the five best 3D printers under $1,000.
| Product | Layer Thickness | Max Build Size | Filament Diameter | Supported Materials | Connectivity | Weight |
| Creality CR-10S | 100 microns | 11.8 x 11.8 x 15.8 in | 1.75 mm | PLA, ABS, TPU, PETG, and more | USB, SD card | 28.6 lb |
| Maker Farm Pegasus | 50 microns | 11.5 x 12 x 13.5 in | 1.75 mm | PLA, ABS, PETG, Nylon, and more | USB, SD card | 30 lb |
| Original Prusa i3 MK3 | 50 microns | 9.8 x 8.3 x 8.3 in | 1.75 mm | PLA, ABS, Nylon, HIPS, and more | USB, SD card | 14 lb |
| BIBO2 | 50 microns | 8.4 x 7.3 x 6.3 in | 1.75 mm | PLA, ABS, PVA, HIPS, and more | Wi-Fi, USB, SD card | 28.7 lb |
| FlashForge Creator Pro | 100 microns | 8.9 x 5.8 x 5.9 in | 1.75 mm | PLA, ABS, PVA, TPU, and more | USB, SD card | 32.7 lb |
 Creality CR-10S
Out of the box, the CR-10S is already halfway assembled, although it appears to be a DIY kit. Even with the crappy instruction manual, it’s easy to assemble. The print bed calibration is a bit tricky, but overall the entire initial setup should only take about one hour.
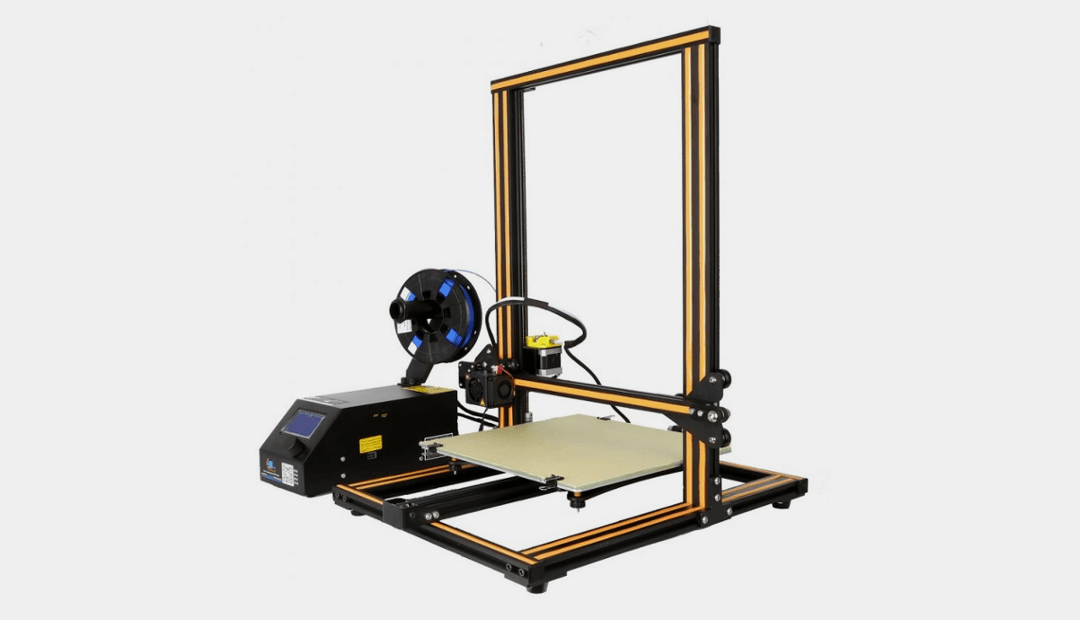
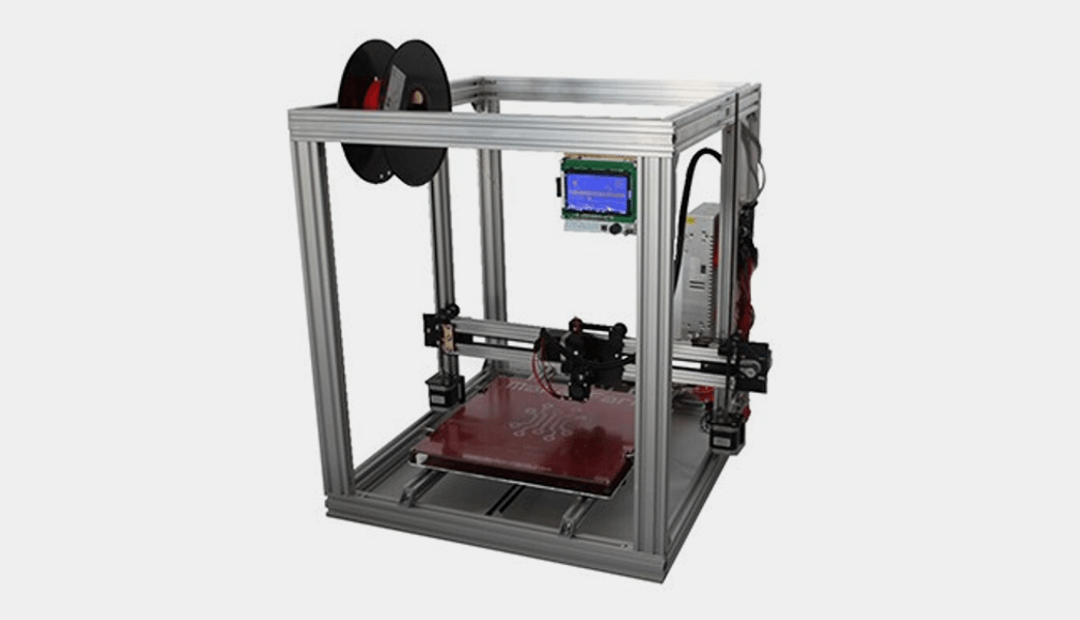
The CR-10S is notable for its quality construction, boasting a sturdy and stable frame specifically built to handle large print jobs that can take over 12 hours to complete. It’s connected to a rather bulky control box, which houses a knob-operated LCD interface for direct control.
The CR-10S is the upgraded version of the CR-10, another great 3D printer that you can get for less than $500. The upgraded printer now includes a filament sensor and the ability to resume prints after a power failure. Of the two, the latter is arguably the most useful since starting over from scratch after a power failure is never a good thing, especially with large print jobs, which the CR-10S is built for.
Like most other 3D printers, the CR-10S needs some tinkering before it can produce consistent results. The good news is that it has a large community online, so it’s easy to find specific guides and instructions on how to optimize the CR-10S.
The CR-10S is definitely worth the time and money. At full power, the CR-10S can produce outstanding results and go toe to toe with high-end 3D printers. If you want a 3D printer with a massive build volume but don’t want to spend more than $1,000, get the CR-10S.
 Maker Farm Pegasus
The Pegasus is available in three sizes: 8-inch, 10-inch, and 12-inch. The 12-inch Pegasus is the best option if you have a $1,000 budget. Maker Farm offers different configurations, allowing you to customize the Pegasus’s setup right off the bat. But it’s also worth noting that the Pegasus basic kit does not come with a power supply, so don’t forget to get one as well.
Since the Pegasus is a DIY kit, it needs to be assembled from scratch. Maker Farm includes an easy-to-follow instruction manual in the package, making the initial setup less confusing. Still, expect to spend around six hours for the assembly, which is actually fast considering most DIY kits take about 10 hours to put together.
The Pegasus is housed in a robust aluminum frame, boasting a massive build volume that allows you to print more complex, even functional, 3D models. Unlike the 8-inch and 10-inch versions, the 12-inch Pegasus already comes with an onboard LCD interface, which allows for direct controls. The onboard interface also includes an SD card slot for standalone offline printing.
A recommended 3D printer for tinkerers and hobbyists, the Pegasus isn’t equipped to produce excellent results right off the bat. It needs a fair amount of work before it can print 3D models in a consistent and reliable manner. But once armed with the proper print settings and some modifications, the Pegasus is a total workhorse that can print non-stop with minimal issues.
 Original Prusa i3 MK3
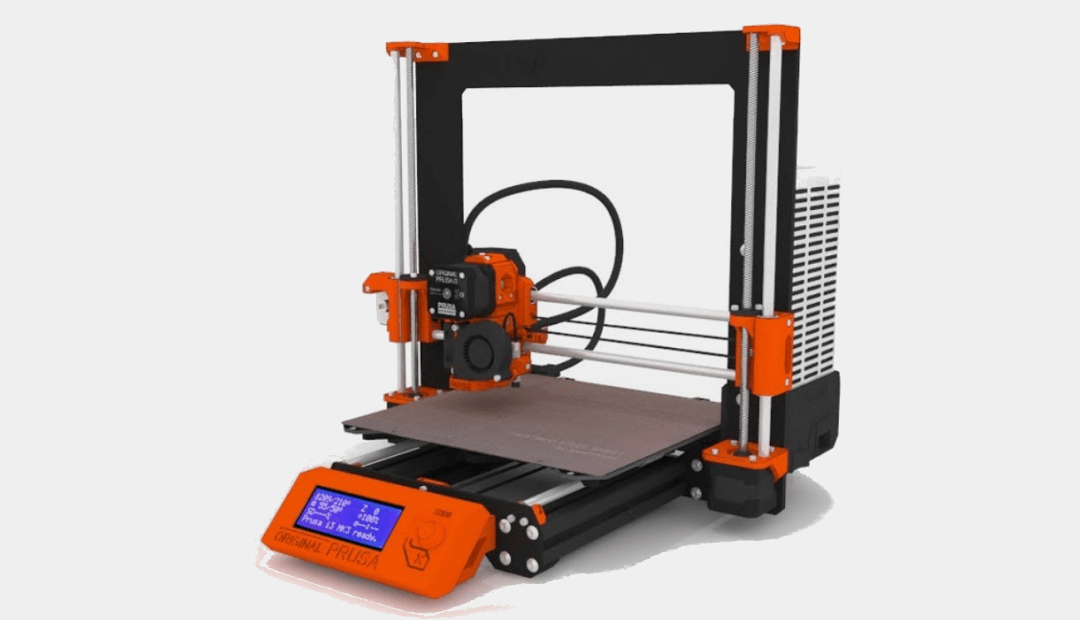
Like its predecessors, the MK3 is available in kit form and in pre-assembled form. Both are under $1,000, with the pre-assembled form going for just $999. In our books, the MK3 kit is the better buy because the $250 price difference means a lot once you factor in the shipping fee. In addition, assembling the MK3 (and any other DIY kit, in general) from scratch allows you learn about the ins and outs of 3D printers in a more intimate level.
The MK3 kit stands out as one of the easiest DIY kits to assemble, due in part to the comprehensive instruction manual included in the package. The initial setup takes about four to six hours, depending on your skill level with electronics. Everything you need to assemble the MK3 is included in the package. No need to buy additional equipment or parts from the hardware store.
The MK3 includes a filament sensor and the ability to resume from a power loss. The MK3 automatically pauses the print once it is out of filament and waits for you to load a new spool of filament. In addition to that, the MK3 can also detect a clogged nozzle, in which case the MK3 pauses and offers you the chance to clean up the nozzle.
A completely open source 3D printer, the MK3 is a big step up from the MK2S, with noticeable improvements in print speed, print quality, noise level, and reliability. It’s equipped with a removable magnetic print bed for easy removal of completed prints and comes with automatic bed leveling. If you want the best 3D printer under $1,000, look no further than the MK3.
 BIBO2
BIBO2
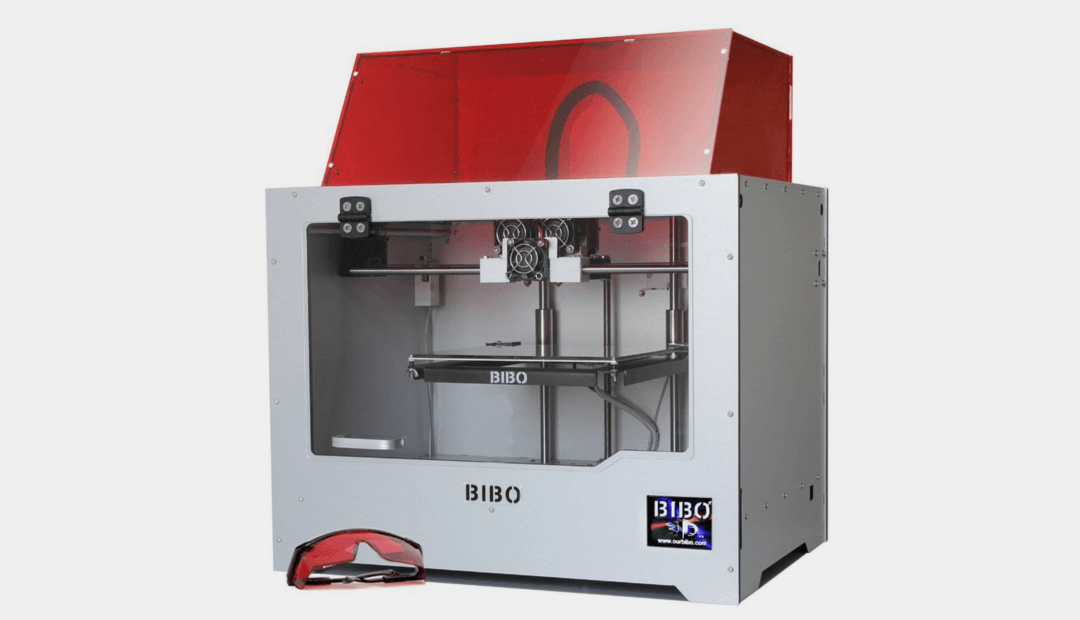
The BIBO2 is a fully enclosed 3D printer with a removable door and top cover for ventilation. It’s got a decent build volume and a heated print bed – the latter means you can print with more exotic materials. It arrives mostly assembled, with only a few parts that need to be installed. In all, the initial setup should only take about a couple of hours, even though the instruction manual isn’t the most detailed.
Most cheap 3D printers come with an LCD interface for direct controls. The BIBO2 isn’t one of them. Instead, the BIBO2 comes with a touchscreen interface, which is responsive and easy to navigate. It also offers a complete connectivity package: USB, Wi-Fi, and SD card. However, the Wi-Fi connection isn’t the most reliable, so it’s best to stay tethered to a computer or just print offline.
Similar to the Original Prusa i3 MK3, the BIBO 2 comes with a filament sensor and a power loss resume feature. The former means you don’t have to worry if the loaded filament comes up short in the middle of the print job, while the latter means you don’t have to start over from scratch in case the power goes out. The BIBO2 is also notable for having a laser engraver, an uncommon feature in a cheap 3D printer.
The BIBO2 may not be as popular as the FlashForge Creator Pro or the Creality CR-10S, two of the most popular China-made 3D printers under $1,000. But it’s definitely one of the best and most affordable dual extruder 3D printers on the market.
 FlashForge Creator Pro
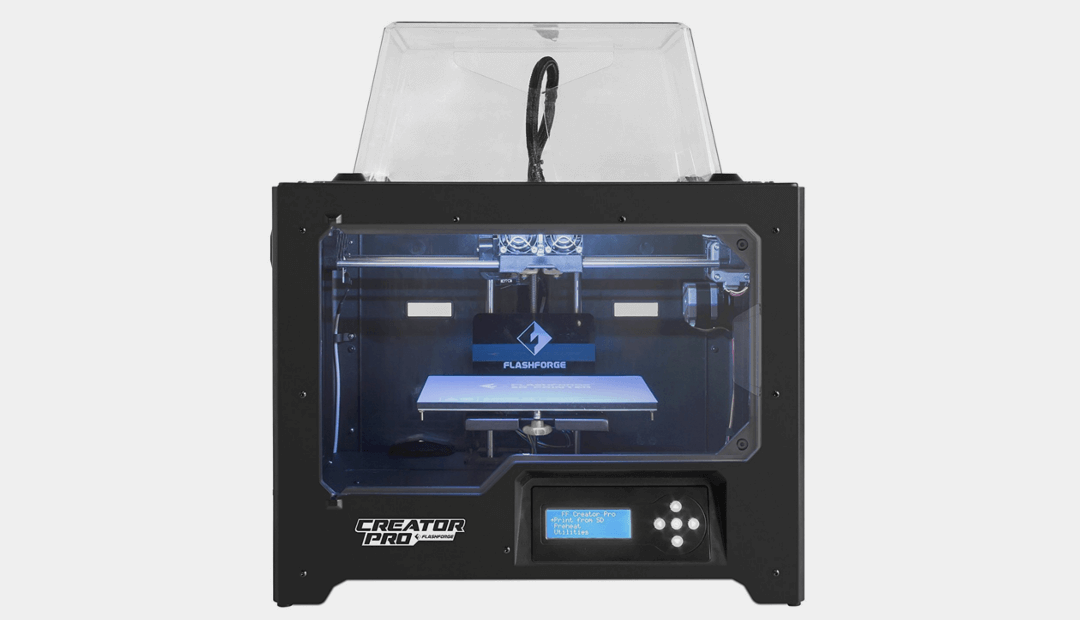
In appearance, the Creator Pro is similar to the BIBO 2. It’s fully enclosed on all sides, with a pair of removable acrylic covers, and comes mostly assembled. However, the Creator Pro’s frame is more stable and a lot sturdier. In addition, the Creator Pro comes with the usual LCD interface instead of a touchscreen variety.
The Creator Pro needs a fair amount of tinkering and adjustments in order to produce the best results. For example, the print bed needs to be modified for better adhesion. It’s also recommended that you replace the default printing software as soon as possible. In case you need suggestions, Simplify3D works extremely well with the Creator Pro (and many other 3D printers, for that matter).
The great thing about the Creator Pro is that it comes with a large community full of enthusiasts, professionals, and tinkerers, so it’s easy to find optimization guides and general tips on the internet. This also means that almost all of the problems you might encounter along the way already have solutions on the net, courtesy of other users who cared enough to share their experiences.
The Creator Pro is arguably the best dual extruder 3D printer you can get for less than $1,000. It’s well-built and easy to use. It’s got a decent build volume, a heated print bed, and an open filament system that allows you to use filaments from third-party vendors. However, the Creator Pro is more of a tinkerer’s machine, so it may not be the most suitable starter 3D printer for beginners.
