


DIY 3D printers are for people who love to tinker with machines and get excited every time they get the chance to build a machine from scratch.
There’s a good selection of DIY 3D printers on the market, ranging from large-format 3D printers to delta 3D printers. But out of all the DIY kits currently available, there are only about a dozen or so that are worth your money.
This guide is about those products. Or more specifically, this guide is about the best cheap DIY 3D printers that you can buy today. The products listed here are all available under $1,000, with the cheapest one going for less than $200.
Here’s a quick look at the products listed here, arranged in a neat comparison table to give you an idea on how they stack up against each other in regard to technical specifications. The products are listed according to price, starting with the most expensive one.
| Product | Layer Thickness | Max Build Size | Filament Diameter | Supported Materials | Connectivity / Weight |
Weight |
| Original Prusa i3 MK3
|
50 microns | 9.8 x 8.3 x 8.3 in | 1.75 mm | PLA, ABS, Nylon, HIPS, and more | USB, SD card / 14lb | 14 lb |
| Original Prusa i3 MK2S | 50 microns | 9.8 x 8.3 x 8 in | 1.75 mm | PLA, ABS, Nylon, Flexible, and more | USB, SD card | 14 lb |
| Creality CR-10S | 100 microns | 11.8 x 11.8 x 15.8 in | 1.75 mm | PLA, ABS, TPU, PETG, and more | USB, SD card | 28.6 lb |
| Maker Farm Pegasus 8” | 50 microns | 7.5 x 8 x 7 in | 1.75 mm | PLA, ABS, PETG, Nylon, and more | USB | 21 lb |
| Tronxy X5S | 100 microns | 13 x 13 x 15.8 in | 1.75 mm | PLA, ABS, PETG, HIPS, and more | USB, SD card | 13 lb |
| Zonestar P802QR2 | 100 microns | 8.7 x 8.7 x 9.4 in | 1.75 mm | PLA, ABS, PVA, Flexible, and more | USB, SD card | 18.7 lb |
| Flsun i3 Plus | 50 microns | 11.8 x 11.8 x 16.5 in | 1.75 mm | PLA, ABS, PETG, HIPS, and more | USB, SD card | 22 lb |
| Jgaurora A3 | 100 microns | 7.9 x 7.9 x 7.1 in | 1.75 mm | PLA, ABS, TPU, Wood, and more | USB, SD card | 22 lb |
| RepRap Guru Prusa i3 V2 | 100 microns | 8 x 8 x 7 in | 1.75 mm | PLA, ABS, PETG, HIPS, and more | USB, SD card | 20 lb |
| Folger Tech 2020 Prusa i3 | 50 microns | 8 x 8 x 6 in | 1.75 mm | PLA, ABS, Wood, TPE, and more | USB | 15.4 lb |
| CoLiDo DIY | 100 microns | 7.9 x 7.9 x 6.7 in | 1.75 mm | PLA | USB | 24 lb |
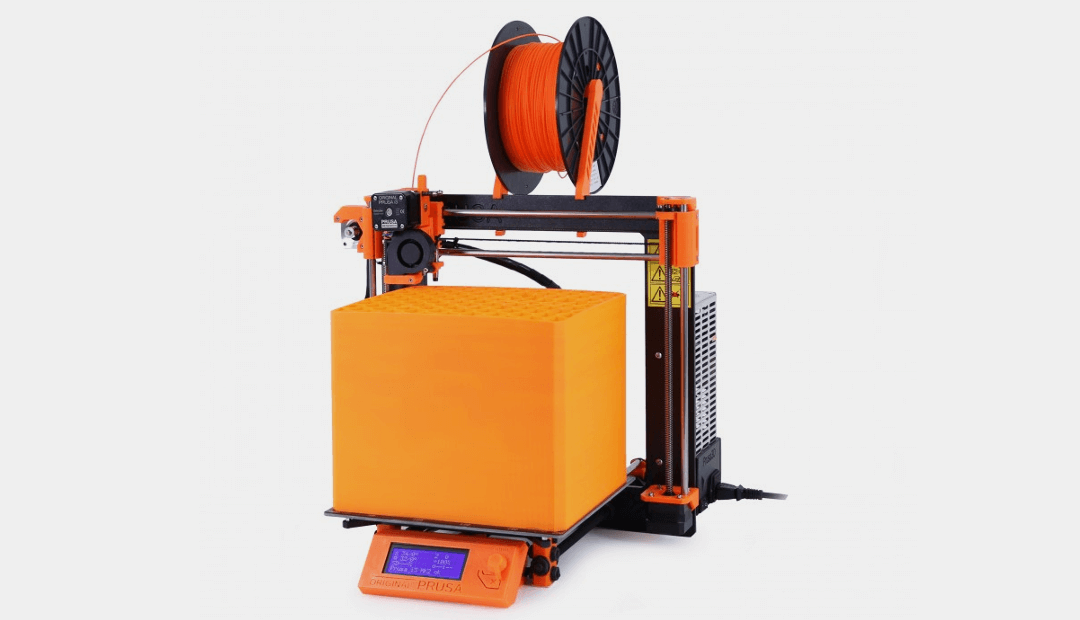
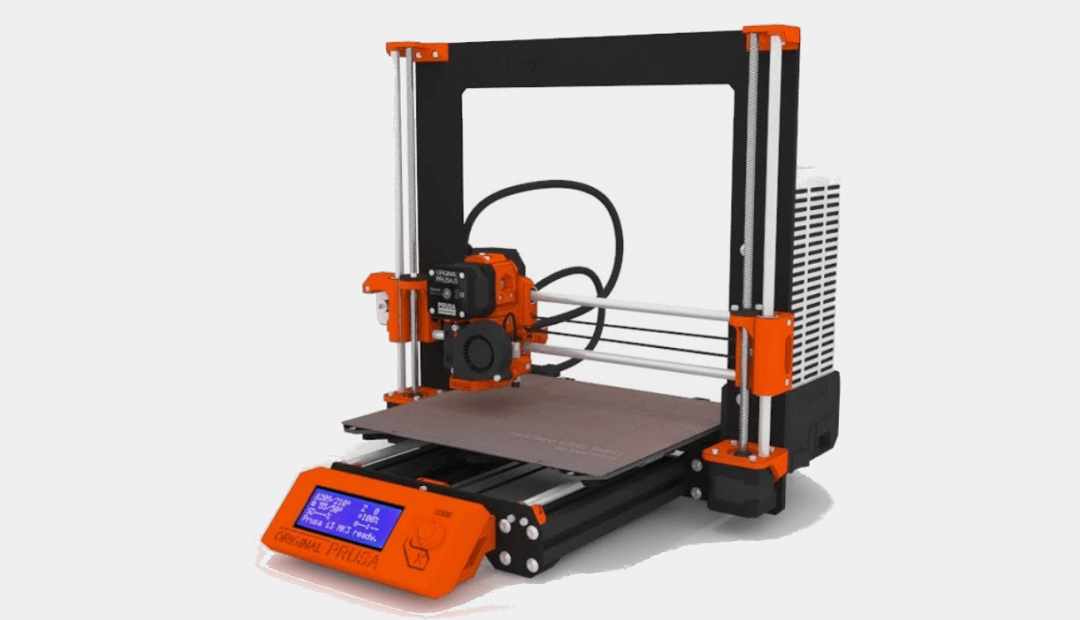 Original Prusa i3 MK3
The MK3 is one of the most beginner-friendly DIY 3D printers on the market, boasting a straightforward assembly process that only takes less than six hours. The instruction manual is easy to follow and detailed and includes lots of images to guide you.
Housed in a sturdy aluminum frame, the MK3 comes with a reworked Y-axis, a new motherboard, a redesigned print head, a couple of new thermistors, a removable magnetic heated build plate, and a bucket of features that make the MK3 one of the smartest 3D printers on the market. The print head has a Bondtech extruder for more push-out force and an E3D V6 nozzle built for high-temperature performance.
The MK3 has a sensor that can detect the presence and movement of the filament. When the loaded filament is about to run out, the MK3 pauses the print and gives you the chance to load a new spool. In addition, the MK3 can detect a clogged nozzle. In which case, it similarly pauses the print and waits for you to clean the nozzle.
With the MK3, you’ll never have to worry about losing your print progress and starting over from scratch if the power goes out mid-print. It’s equipped with a power panic feature and can fully recover the print as soon as the power returns. This is a godsend feature for large-scale, high-resolution print jobs that take more than 12 hours to complete.
The MK3 is a completely open source 3D printer and is compatible with third-party filaments and different slicers. It’s very easy to use and comes with everything you need to get started right away – including a spool of PLA filament, pre-loaded 3D models on the SD card, and even a 3D printing handbook. Prusa Research rolls out each MK3 with good print settings, which means you can produce quality prints right out of the box.
At the moment, there are no other DIY 3D printers that can offer everything the MK3 brings to the table. It’s more expensive than most of the competition, but you definitely get more than what you pay for. If you have a $1,000 budget, the MK3 should be the first product you should consider.
 Original Prusa i3 MK2S
The MK2S has become more affordable since the release of the MK3. Currently, it retails for just $599 at the Prusa Research official store. That number puts it right in line with the Creality CR-10S, arguably the biggest threat to the Original Prusa i3 series in the under-$1,000 price range.
On the surface level, the MK2S is almost identical to the MK3. It sports the same orange-and-black color scheme, with the option for an all-black outfit, and comes with an LCD interface at the base and a spool holder at the top of the frame. The frame is made of aluminum and is durable enough to withstand hundreds of hours of printing.
Just like the MK3, the MK2S is easy to assemble. It comes with a comprehensive instruction manual that turns the initial setup into a cakewalk and a 3D printing handbook. Prusa Research offers a top-notch customer service in different languages, so it’s easy to get help from the manufacturer. In addition to that, the MK2S has a large online community where you can get tips and advice.
The MK2S is faster and more precise than the original MK2. It’s capable of producing incredibly detailed and smooth 3D models. Even at low settings, the print quality is really good. The MK2S is compatible with different printing software, including Cura, one of the most popular slicers around. Prusa Research recommends PrusaControl for beginners and Slic3r Prusa Edition for intermediate users.
The MK2S can print with various types of material – including ABS, HIPS, and Nylon – out of the box. It’s equipped with an E3D V6 hotend built for high-temperature prints and a heated print bed. The surface of the print bed has excellent adhesion by default. No need to resort to the usual adhesion tricks (e.g. hairspray and glue). The print bed calibration process is also easy, courtesy of the automatic bed leveling technology.
It’s a tough pick between the MK2S and the CR-10S. But in the end, it depends on your specific needs. If you want a massive build volume, definitely go for the CR-10S. But if you want a 3D printer with automatic bed leveling technology, requires minimal tinkering at the onset, and comes with actual customer support, go for the MK2S.
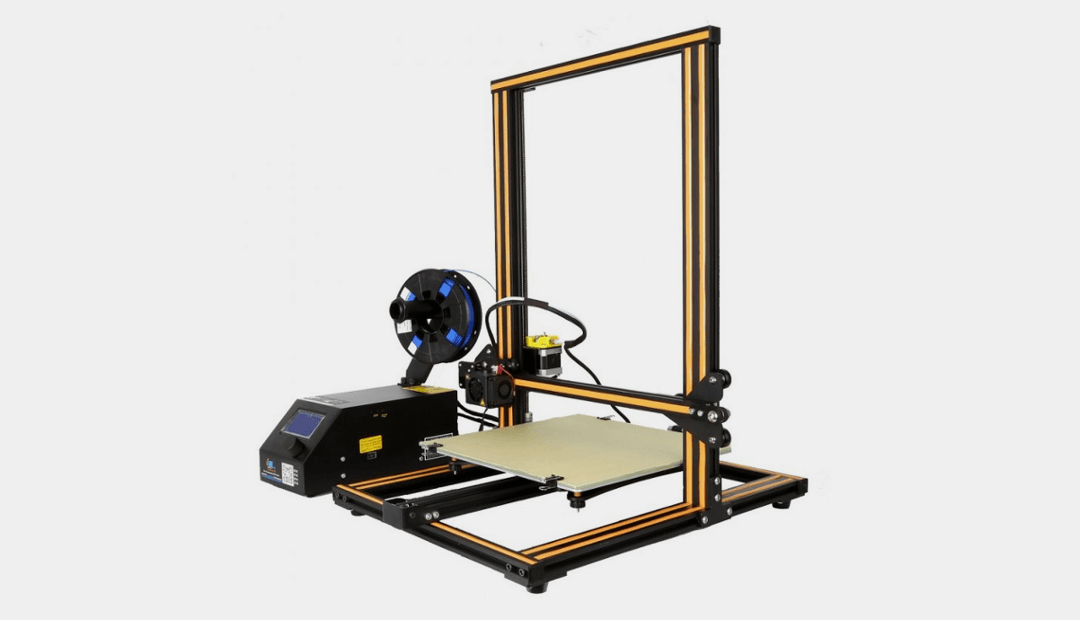 Creality CR-10S
The CR-10S is extremely easy to assemble. It’s not a full DIY kit like the other products on this list. It arrives mostly assembled – all you need to do is attach the frames together and you’re good to go. However, you need to double-check all the nuts and bolts because Creality has bad quality control. In all, the initial setup only takes about one hour, and that includes the bed leveling and software installation.
The CR-10S is the upgraded version of the CR-10. In appearance, the CR-10S is identical to the older version, featuring a sturdy aluminum frame and a separate control box that houses the onboard interface and the USB and SD slots. The spool holder is mounted at the top of the control box as well. The CR-10S now includes dual lead screws for better stability during large-scale prints, a filament sensor, and, most importantly, a better motherboard.
Though not loaded with features, the CR-10S is one of the best and most popular 3D printers under $1,000, and you don’t have to look hard for the reason for that. The CR-10S literally stands out because it has one of the largest build volumes on the market. It’s larger than the LulzBot TAZ 6, which retails for $2,500. Just think about that for a moment.
Of course, the CR-10S isn’t just about that enormous build volume. It combines its generous build size with outstanding print quality and reliability. It can produce highly detailed and smooth 3D models in a consistent manner. The heated build plate means you can experiment with various materials – although the CR-10S needs a few upgrades in order to successfully print ABS and other high-temperature materials and is basically limited to PLA at the onset.
If the build volume of the MK3 or MK2S is not enough for you, get the CR-10S. It’s a reliable 3D printer that gets the job done with minimal issues. Even though Creality has a non-existent customer support, it’s easy to get help for the CR-10S at online forums, not to mention there are lots of tutorial videos on the internet.
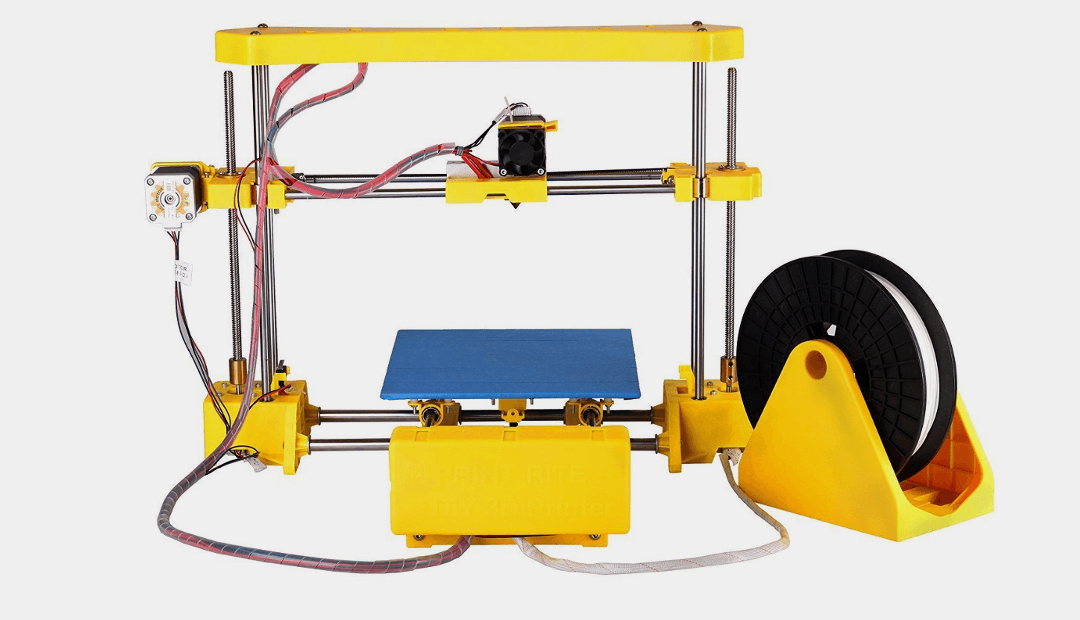
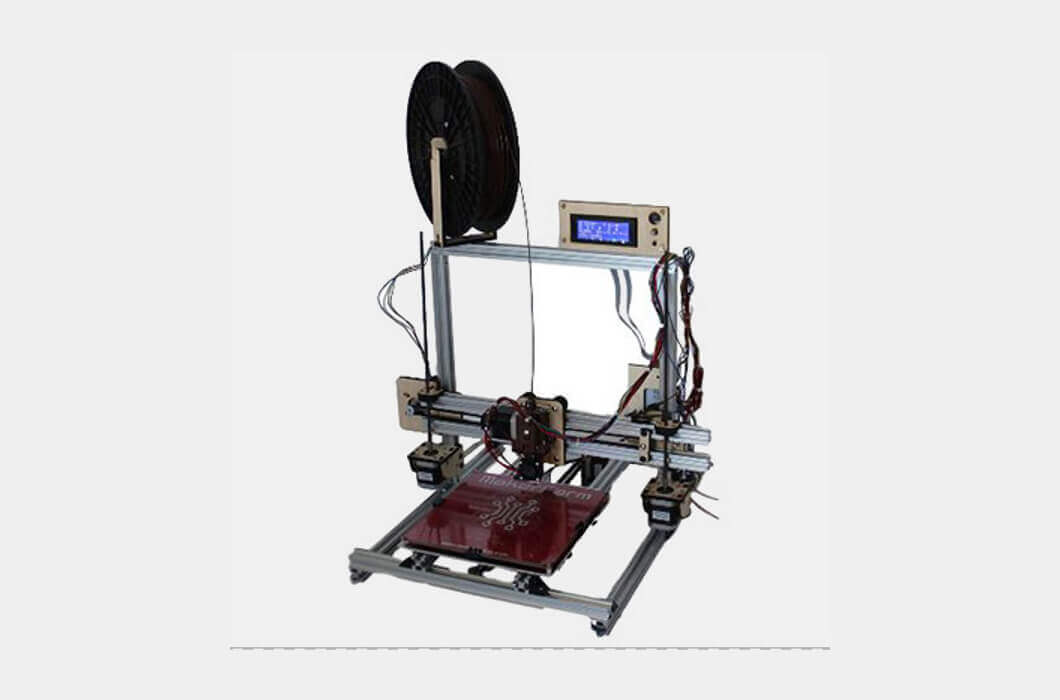 Maker Farm Pegasus 8” DIY 3D Printer
The Pegasus comes in three sizes: 8-inch, 10-inch, and 12-inch. Though the 12-inch version is also available under $1,000, the former two are the true budget options, with the basic kit of each version retailing for less than $500. But unlike the 12-inch version, the smaller versions don’t come with LCD interfaces out of the box, so connectivity is limited at the onset.
It’s easy to assemble the Pegasus. Though not exactly perfect, the instruction manual is easy to follow and is detailed in the most technical areas. It takes about six to eight hours to assemble the Pegasus, although experienced hobbyists and tinkerers might be able to do it in less than six hours. In case you need help during the assembly or have issues with the unit you received, just contact the manufacturer. Maker Farm is known for having a top-notch customer service, with Colin Farrer, the company president, spearheading the effort to make sure every customer issue gets attended to in a timely and professional manner.
The Pegasus is housed in a robust aluminum frame, making it a lot more stable than 3D printers made of acrylic frames. It can hold its own during large-scale prints with minimal issues and can print non-stop for days. However, the Pegasus needs a few upgrades before it can produce the best print quality. This is actually a common thing for DIY 3D printers under $500.
Once fully optimized, the Pegasus is a total workhorse that can consistently produce impressive results. The print quality is excellent for a cheap 3D printer, and the print speed isn’t too shabby, either. The Pegasus is one of those 3D printers that are worth the effort and extra money for the upgrades.
The Pegasus is a high-quality product that deserves to have more customers. It’s a robust machine that, with the right setup, can go head-to-head with some of the most popular 3D printers on the market. It’s easy to upgrade, too, so it’s a great machine for tinkerers.
 Tronxy X5S
At just under $400, the X5S is easily one of the cheapest large-format 3D printers on the market. It’s housed in a rigid aluminum frame, making it more stable, especially during large-scale prints. There’s nothing unique about the X5S, though. It comes with a set of features commonly found in DIY kits: an onboard LCD interface, a heated print bed, and USB and SD ports.
Unlike the CR-10S, a semi-assembled 3D printer, the X5S is a full DIY kit that needs to be assembled from scratch. The entire setup, including the initial calibration, can be accomplished in under eight hours, though experienced tinkerers can get it done in six hours or less.
However, the X5S is not the most beginner-friendly DIY kit on the market, and there are several reasons for that. For starters, the instruction manual is terrible. A good instruction manual is critical for beginners. It can mean the difference between having an easy time during the initial setup and throwing the entire kit at the wall out of frustration because everything doesn’t make sense.
There’s also the issue with the firmware. The X5S comes with an outdated firmware that needs to be updated immediately. Updating a firmware isn’t exactly the kind of activity beginners should dive into. It’s reserved for those who already have experience with 3D printers.
The performance of the X5S largely depends on the adjustments you make. In its default condition, the X5S produces more problems than actual results, not to mention it’s practically limited to PLA. But with the right print settings and a few upgrades in several areas, it’s the complete opposite: the X5S can produce outstanding results with minimal issues. It’s certainly worth the pick-up if you can afford to invest the time and money for upgrades.
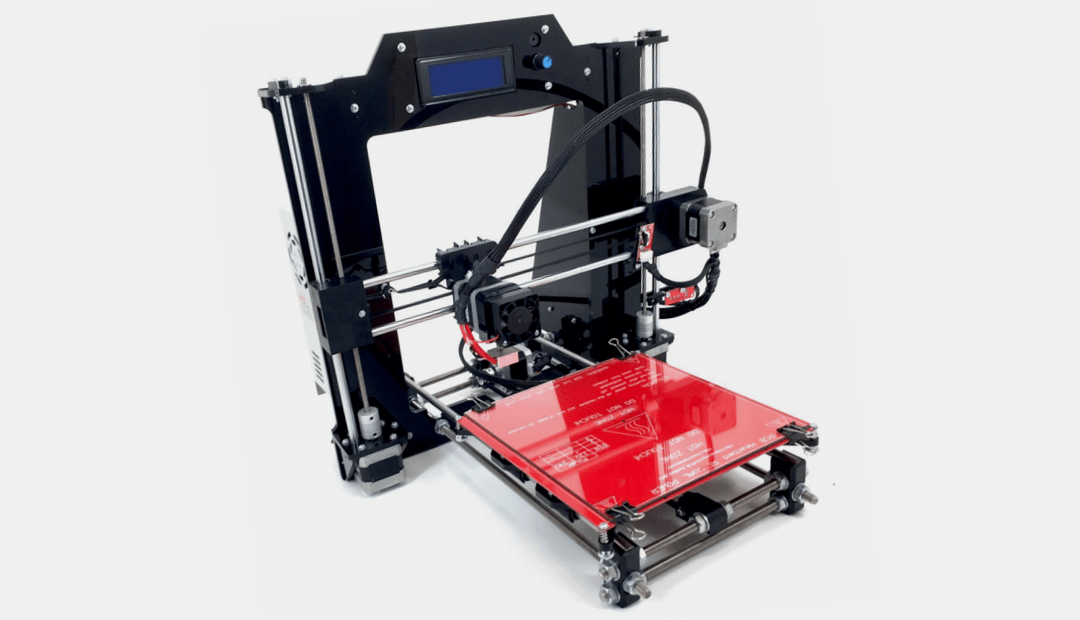
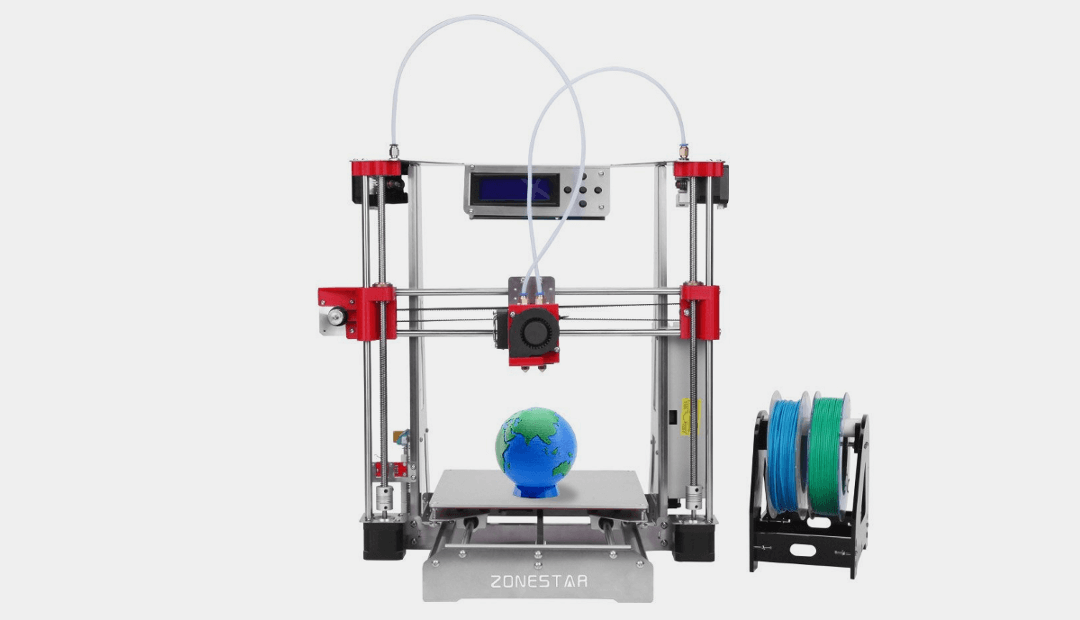 Zonestar P802QR2
The P802QR2 comes with an easy-to-follow instruction manual. The English texts are not exactly perfect, but they are coherent enough for beginners to understand. In addition, there are instructional videos on the internet to help you go through the assembly process, which can take around six to eight hours, the common timeframe for most DIY kits.
Zonestar also stands out for having an excellent customer service. The Chinese company responds in a timely and professional manner and promptly attends to customers who receive units with defective parts. If you need any help, most especially during the initial setup, just e-mail the company.
The P802QR2 is a Prusa-based 3D printer. The model name refers to the dual extruder setup with automatic bed leveling technology. There are several variations of this DIY kit, including a single extruder setup with a filament run-out sensor. If you still can’t afford to listed product here, feel free to go for the cheaper, single extruder version. (But seriously, the dual extruder setup is ridiculously cheap. It’s even available for less than $300 in some places.)
This Prusa-based 3D printer from Zonestar is housed in a robust aluminum frame, making it infinitely more stable and more durable than acrylic-framed DIY kits. The metal frame also means you’re safe from the common issues encountered by plastic 3D printers (read: warping). This 3D printer is also notable for having a large build volume. It’s larger than most 3D printers in the same price range and is even larger than other products that go for double the price.
Courtesy of its open filament system, the P802QR2 can print with filaments from third-party sellers. In addition, its heated print bed means you can experiment with different types of materials. The dual extruder setup immediately tells you that this 3D printer can print support materials, which allows you to take on more complex 3D models.
Overall, the P802QR2 is a high-quality product that doesn’t come with some of the usual issues associated with Chinese DIY kits (e.g. poor documentation and non-existent customer support). It’s relatively easy to assemble, comes with an automatic bed leveling technology that actually works as intended, and packs a generous build volume.
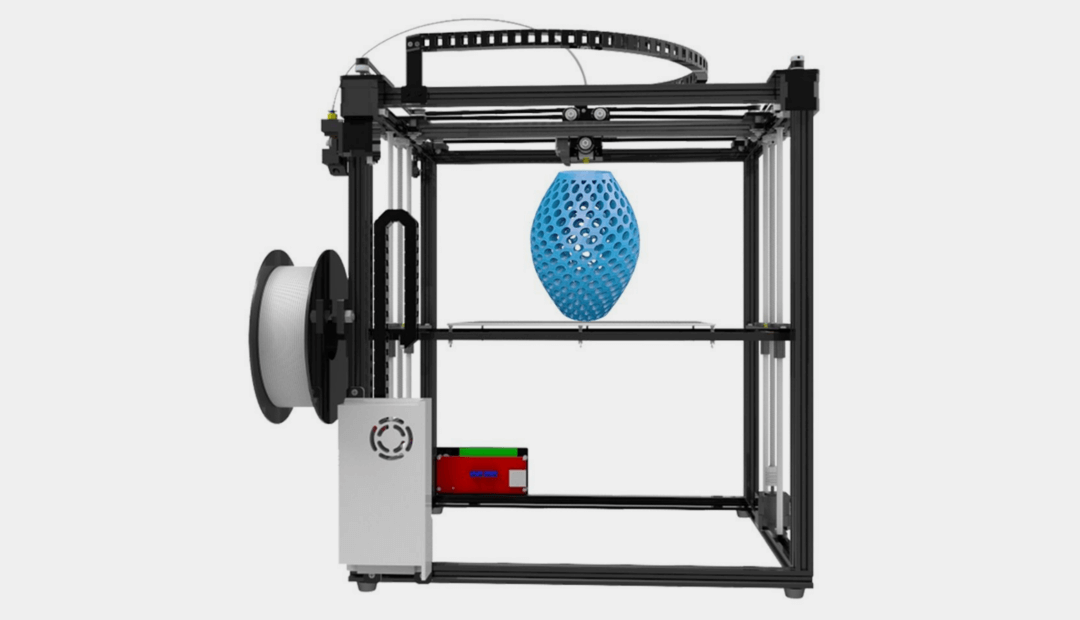
 Flsun i3 Plus
This DIY kit is not recommended for beginners. The Flsun i3 Plus takes more than 10 hours to assemble, and the poorly written instructional manual is a big reason for that. It’s best to just ignore the instruction manual and head straight for online resources. But on the bright side, Flsun provides good customer service, so at least you can rely on the company when things go wrong during the assembly process.
The Flsun i3 Plus is aluminum-framed and comes with a dual extruder and a heated print bed. The dual extruder allows you to print with two colors while the heated print bed means you can print with various materials. However, the Flsun i3 Plus can’t do both out of the box – it requires upgrades before it can deliver quality results.
The touchscreen interface is a nice addition. It’s responsive and easy to use and has straightforward options for the print settings. Most DIY kits in the same price range come with knob-operated onboard controls, so that’s another reason Flsun’s large-format Prusa i3 stands out. The auto bed leveling technology is accessed through the interface. It’s a mixed bag, though. It only seems to work in the single extruder mode.
If you want a cheap 3D printer with a massive build volume, consider the Flsun i3 Plus. It’s not on the same level as the Creality CR-10S in terms of overall quality, but with the right configurations and upgrades, it can produce great results.
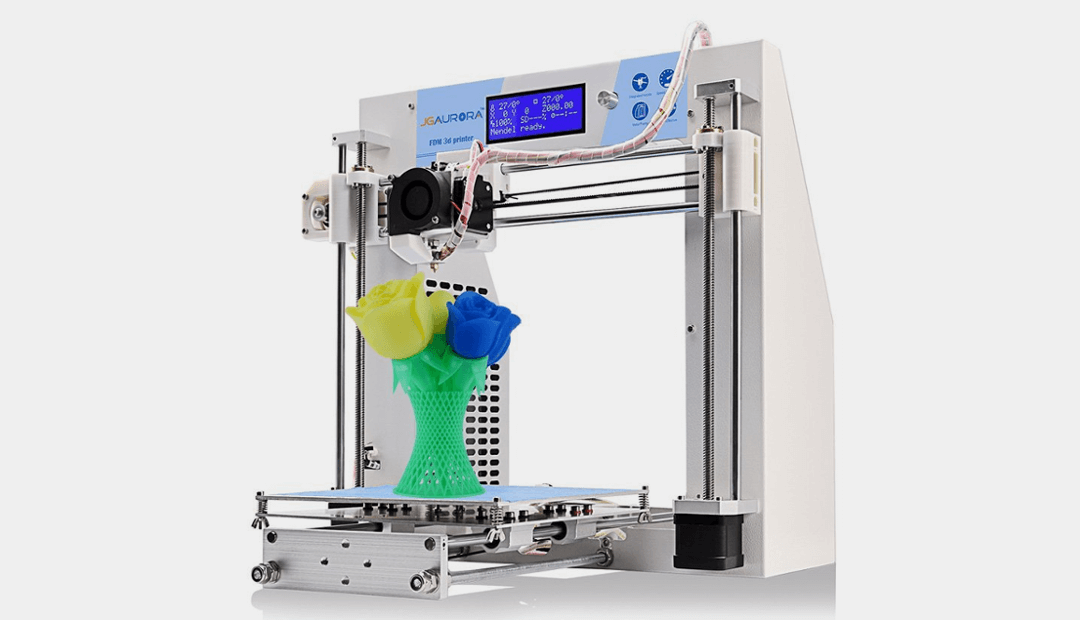 Jgaurora A3
The A3 has an all-metal frame, instantly making it more durable and more stable than plastic-framed DIY kits. It’s equipped with the usual knob-operated LCD interface, located at the top of the frame, and comes with a heated build plate. The heated print bed is a necessary component for high-temperature materials, and that includes ABS, the second-most common material.
The assembly can take around eight to 10 hours, plus another hour or two for the initial calibration. Calibrating the print bed is the most time-consuming part of the initial setup. It’s manual all the way, so expect to be frustrated during your first few tries – unless you already have extensive experience with DIY kits and the manual bed calibration process.
It’s common for Chinese DIY kits to have poor documentation, and the A3 is no exception. In fact, there’s no written instruction manual in the package. Instead, you get a set of video instructions with subtitles – there’s no audio to guide you – included in the SD card. The subtitles are mostly coherent, so the assembly process isn’t exactly a nightmare.
The A3 is a reliable workhorse once you get it properly tuned-up. It can print accurate and detailed 3D models with a level of smoothness that might surprise you. It’s got a large build volume as well, giving you the green light to print more complex items.
The A3 is a cheap DIY 3D printer that doesn’t try to be fancy with glitzy features. It just goes straight to the point and gets the job done in a consistent manner. It’s hands down one of the most reliable DIY 3D printers that you can get for less than $300.
 RepRap Guru Prusa i3 V2
Unlike most of the other products listed here in our guide to the best cheap DIY 3D printers, the V2 is housed in an acrylic frame. This makes it less durable and less stable than aluminum-framed ones. Since plastic frames are not built for high temperatures, the V2 is basically limited to PLA. In fact, the V2 is very limited out of the box and is in need of immediate upgrades in several areas. It’s a DIY kit that demands more effort and patience than usual, so it’s not the most ideal machine for beginners.
The V2 arrives in a neat and secure package. It requires around eight hours minimum for the assembly and another hour for the initial calibration. It’s not the most complicated DIY kit to put together, at least compared to the Flsun i3 Plus. However, the instruction manual can be really confusing in several areas – the documentation is for the older version of the product, the V1.
RepRap Guru has good customer service and is quick to reply to inquiries. But the company has a bit of a reputation online. RepRap Guru offers a free roll of filament in exchange for reviews on Amazon. It’s a suspicious and unethical practice, even though the US-based company isn’t specifically asking for positive reviews.
In all, the V2 is a good DIY kit that you can get for less than $300. It’s a 3D printer that needs modifications out of the box, so expect to spend another $100 for upgrades at the onset. But even with upgrades, the V2 still has glaring limitations and should only be deployed for print jobs that involve PLA.
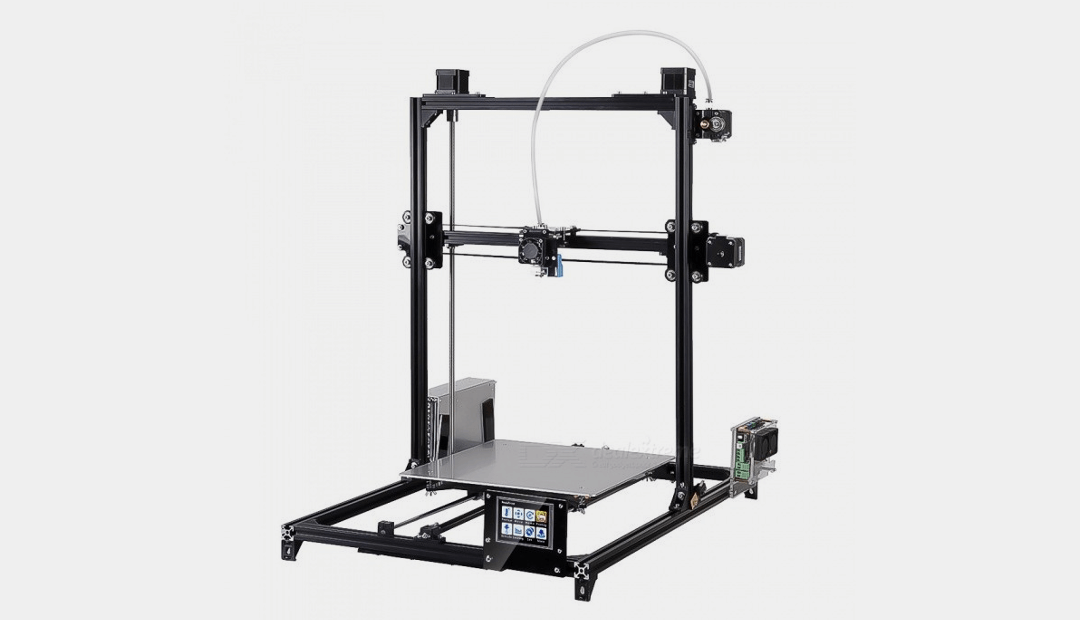
 Folger Tech 2020 Prusa i3
The Folger Tech 2020 Prusa i3 takes about six to eight hours to assemble, but no thanks to the useless instruction manual. In order to get it done, you need to watch instructional videos or read guides on the internet. It’s kind of disappointing the instruction manual is in a useless state considering the manufacturer is based in the US. Then again, it’s not very uncommon for 3D printers under $300, kit or not, to have a crappy documentation.
This Prusa-based DIY 3D printer is housed in a rigid aluminum frame, making it more stable and more prepared to handle extended print jobs. The cables around the frame are a bit of a mess, though, so make sure to attend to that issue immediately.
The Folger Tech 2020 Prusa i3 comes with a heated build plate, making it possible to print with various filaments – but not out of the box. This kit needs a fair amount of upgrades before it can produce results that you can be proud of. It’s best to look into specific guides about high-temperature materials and their hardware requirements on the internet.
If you’re a tinkerer, the Folger Tech 2020 Prusa i3 is a recommended entry-level 3D printer. It’s easy to upgrade and comes with a generous build volume, which gives it the versatility to accommodate larger and more complex 3D models once you are ready to move up to that level. It takes a while for the Folger Tech 2020 Prusa i3 to get going, but the results are definitely worth the effort.
 CoLiDo DIY
Like the Creality CR-10S, the CoLiDo DIY is extremely easy to assemble. It requires about one hour for the assembly and initial setup, including the print bed calibration. Even though the instruction manual is poorly written, the initial setup shouldn’t be too hard. The CoLiDo DIY is an excellent DIY kit for beginners and those not particularly skilled with electronics. Loading the filament is very easy and removing completed 3D models is hassle-free.
The CoLiDo DIY offers a large build volume, which is not something you normally expect from a product that retails for less than $200. The large build volume means the CoLiDo DIY can accommodate larger and more complex 3D models. But on the other hand, it can only print PLA, so you don’t get to experiment with more advanced materials.
The good news is the CoLiDo DIY is highly upgradeable. Once you’re ready to move up to the next level, you can add a heated print bed and even upgrade the print head. It’s also recommended that you add an LCD interface in order to have the option to print directly from an SD card. Though the default USB connection is reliable, being able to print without a computer is a lot more convenient.
If you want the cheapest DIY 3D printer that won’t break down after just a few prints, the CoLiDo DIY is for you. It’s easy to assemble, comes with a generous build volume, and produces surprisingly well-detailed prints with the right settings. It’s a recommended 3D printer not just for tinkerers but also for beginners who want to learn the ins and outs of 3D printers.
THE PROS AND CONS OF DIY 3D PRINTERS
A DIY 3D printer comes with both risks and rewards. Here, we list down the pros and cons of DIY kits in order to give you an idea of what to expect when you buy one. It’s worth noting that not all of the pros and cons mentioned here apply to all DIY kits. Because there are DIY kits that are simply better than others and come with fewer red flags.
PRO: Putting together a DIY kit teaches you about the inner mechanics of 3D printers. It gives you an up-close look at what makes 3D printers tick. You’re bound to run into hardware issues at some point. There’s no escaping that. The things you learn during the assembly will prove useful down the line and will help you deal with the most common problems.
CON: There are DIY 3D printers that are ready to print in less than one hour after the assembly. The most notable of which is the Original Prusa i3 series. But for the most part, DIY 3D printers need a fair amount of tinkering before they can produce anything worthwhile. Nearly all the listed products here need to be tinkered with and even upgraded out of the box in order to produce the best results. This means that, on top of the printer’s retail price, you have to add another $100-150, depending on the upgrades needed.
PRO: DIY 3D printers are highly upgradeable. This gives you the freedom to make as many upgrades as necessary, from expanding the build platform to installing a dual extruder setup. This is the chief reason why tinkerers often prefer DIY kits over pre-assembled ones. It’s easy to find optimization guides for popular products such as the Creality CR-10S. But for under-the-radar products with a relatively small user base such as the Maker Farm Pegasus, it can be difficult.
CON: All DIY 3D printers are open-framed. This means they are not the best at maintaining high temperatures, which is necessary for certain materials. The exposed nature of DIY 3D printers also makes them vulnerable to dust and other elements that might affect performance. This is why regular maintenance is necessary for DIY 3D printers. The good news is that it’s easy to build your own enclosure. The more popular the product, the more chances there’s an already existing enclosure model for that specific product.
PRO: DIY 3D printers come with wallet-friendly price tags. This is the primary reason why people go for a DIY kit instead of a pre-assembled one. DIY kits are significantly cheaper, and there’s also the fact that they are more capable compared to pre-assembled 3D printers in the same price range. For example, the FlashForge Finder, which retails for under $400, has a small build volume and can only print with PLA filaments. On the other hand, most DIY kits under $400 come with a more generous build space and a heated print bed – the latter makes it possible to print with more advanced materials.
CON: The majority of the cheap DIY 3D printers on the market come from China. This means that the documentation included in the package ranges from below-average to absolutely crap. Some products don’t even come with an instruction manual. In most cases, you will need to rely on online resources to go through the assembly process. In addition, customer service is a mixed bag. There are companies that provide excellent customer support – like Prusa Research, Maker Farm, Jgaurora, and Flsun. But for the most part, manufacturers of cheap 3D printers don’t have a clue about after-sales support.